The Beat Grows Over
You can purchase a complete video tutorial of this lesson here:
A Step By Step Guide
Canvas Size: 18 X 24
Colors: Cerulean Blue Dark, Cobalt Teal, Naples Yellow, Yellow Ochre, Raw Umber, Burnt Sienna, Titanium White, Zinc White
CLICK ON EACH IMAGE BELOW TO LOOK AT A LARGE VERSION

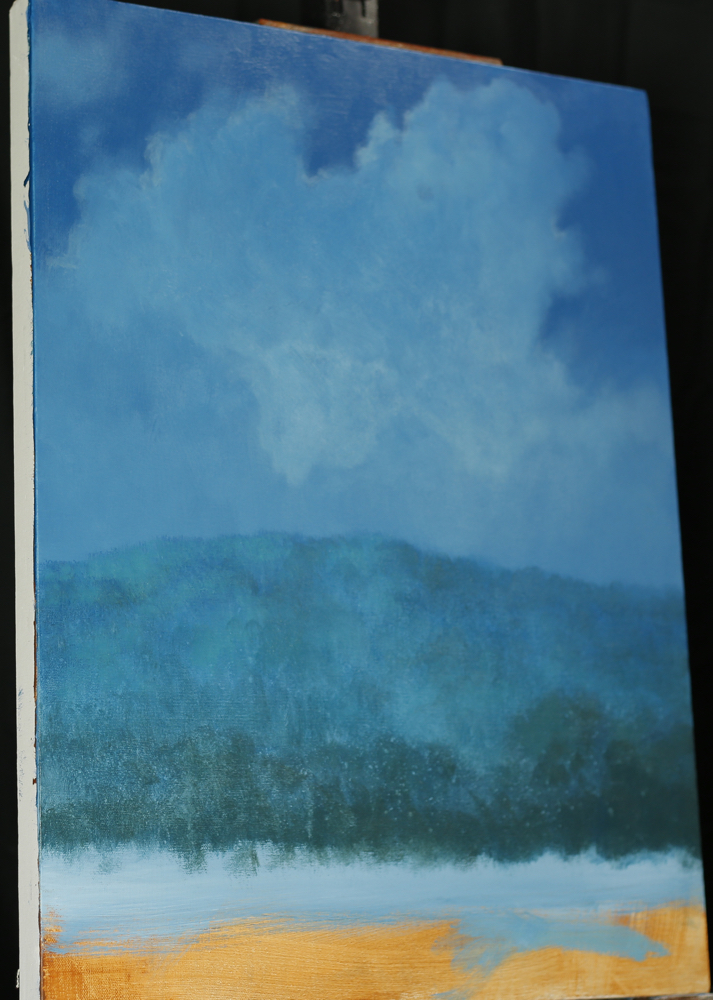
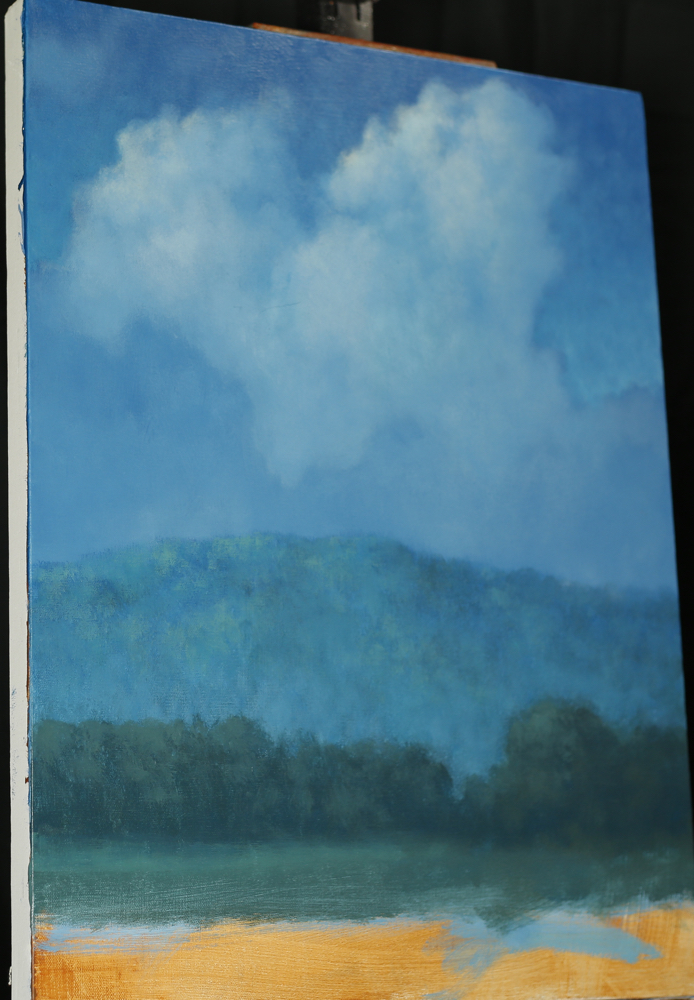
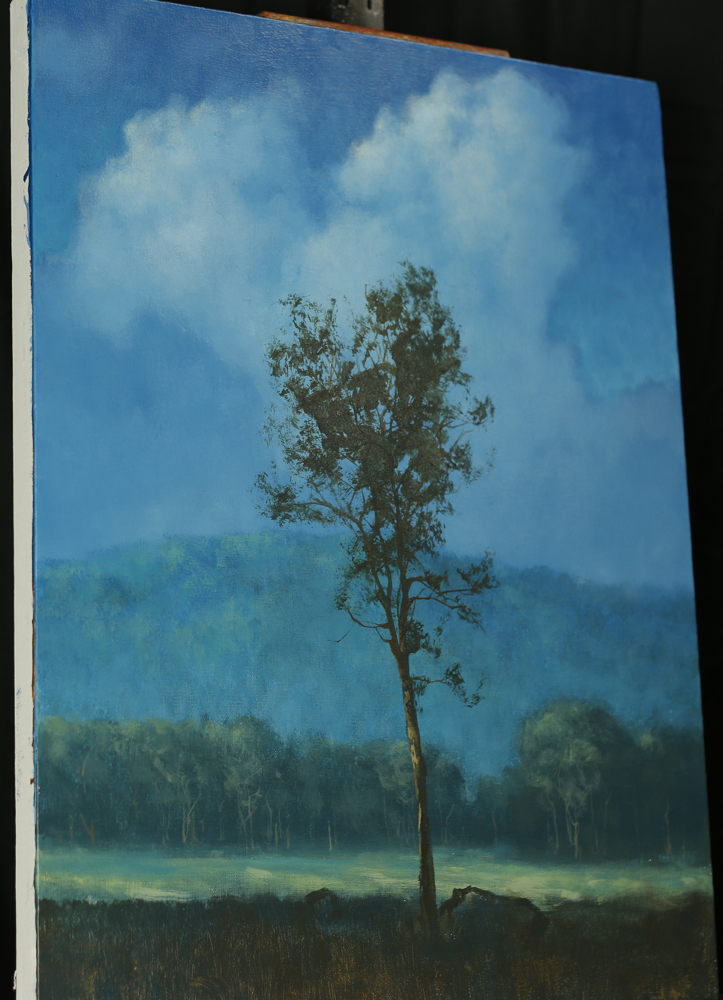
To start this painting we have created a background with Cerulean Blue Dark mixed with Cobalt Teal.
We add a bit of titanium white to the mix as we create a gradient from dark to light as we approach the bottom of the canvas.
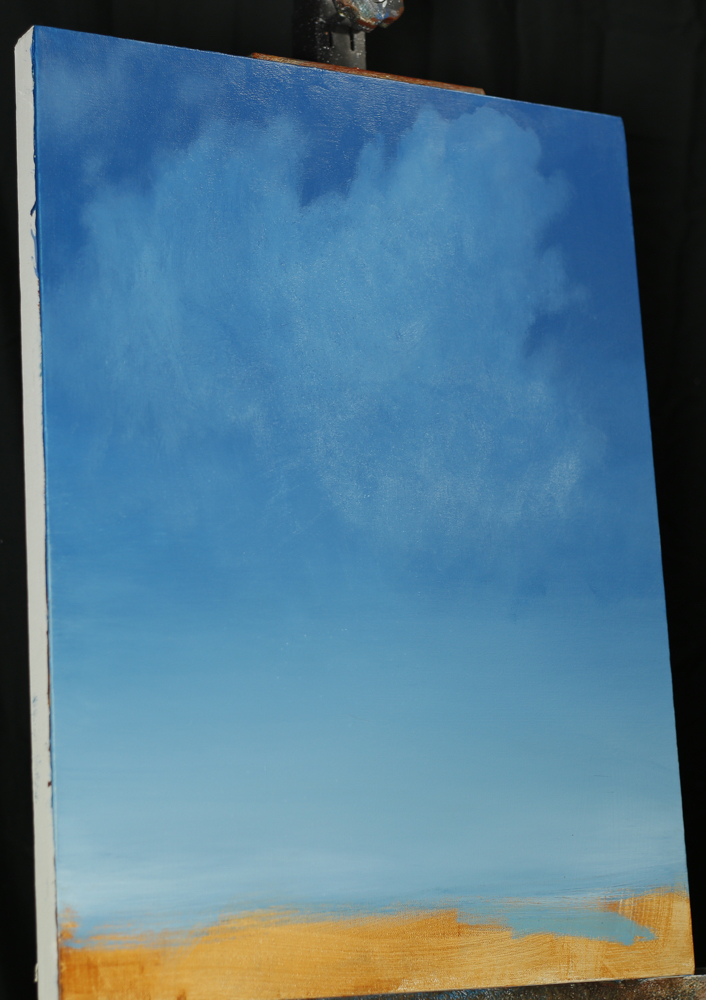
Then we increase the value or lighten that sky color a little bit with titanium white.
With a large round or flat brush we scrub out a silhouette of a cloud.
We want it to be just a little bit brighter than our sky color, just enough so we can see the difference and see the shape of the cloud that we’ve created.

Continue creating the shape of the cloud, trying to make it a solid color from top to bottom.
Slight variations are okay. The important part is to try to make sure the color isn’t too bright, or too white to start with.
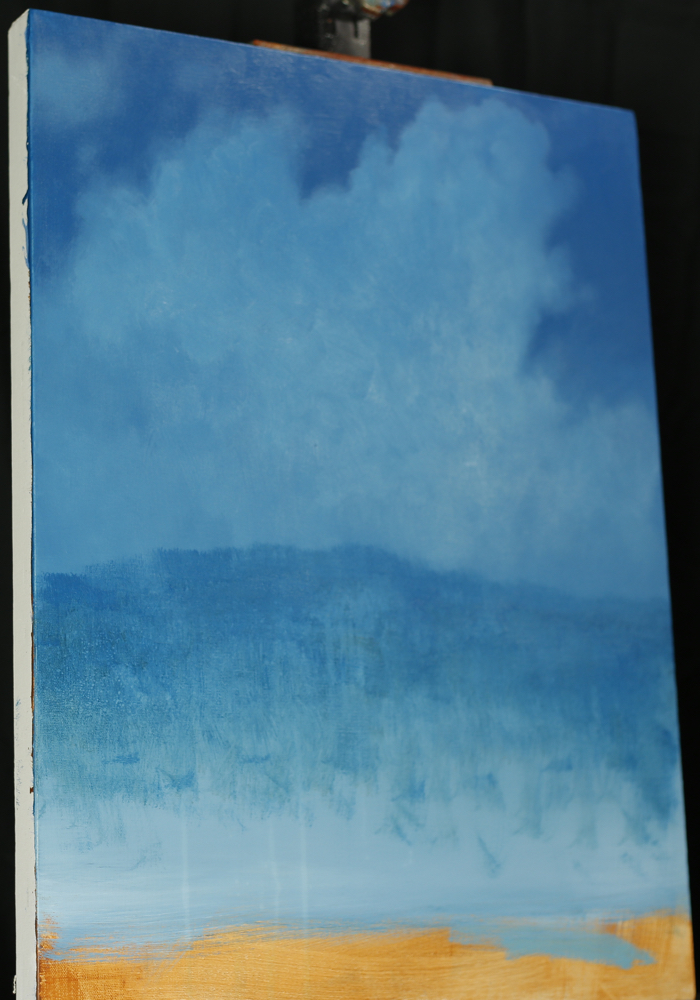
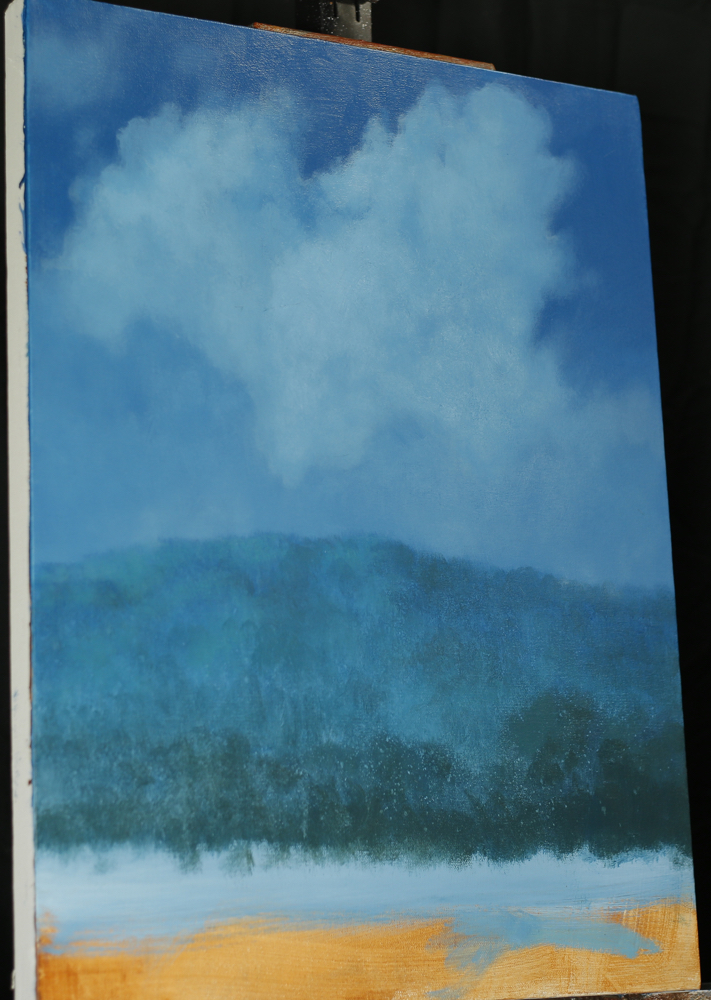
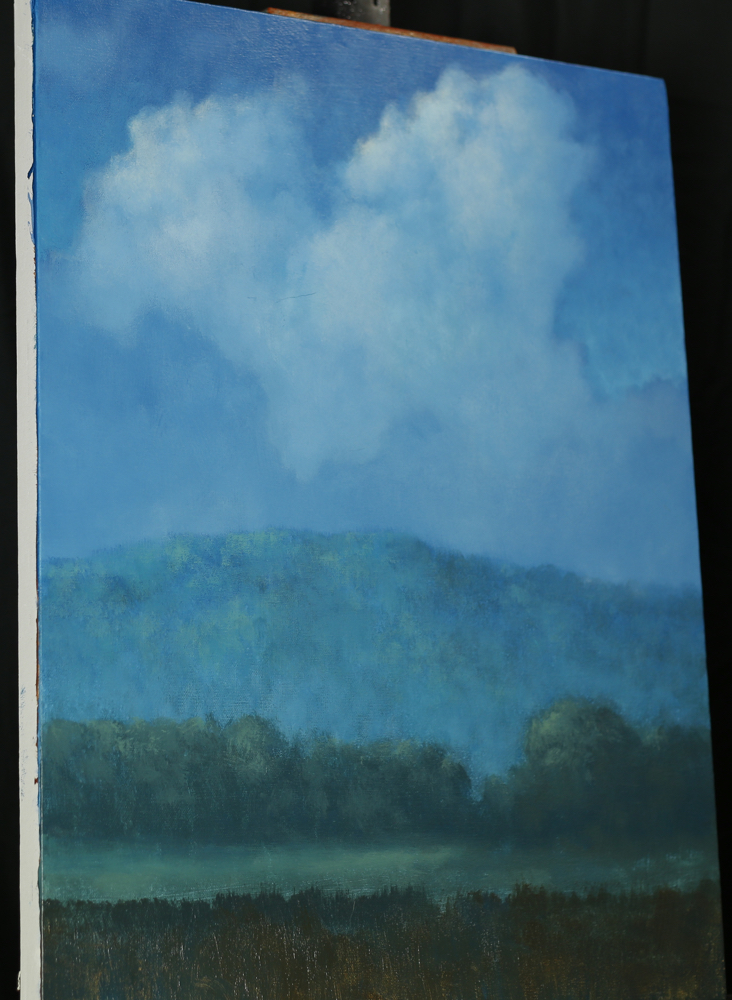
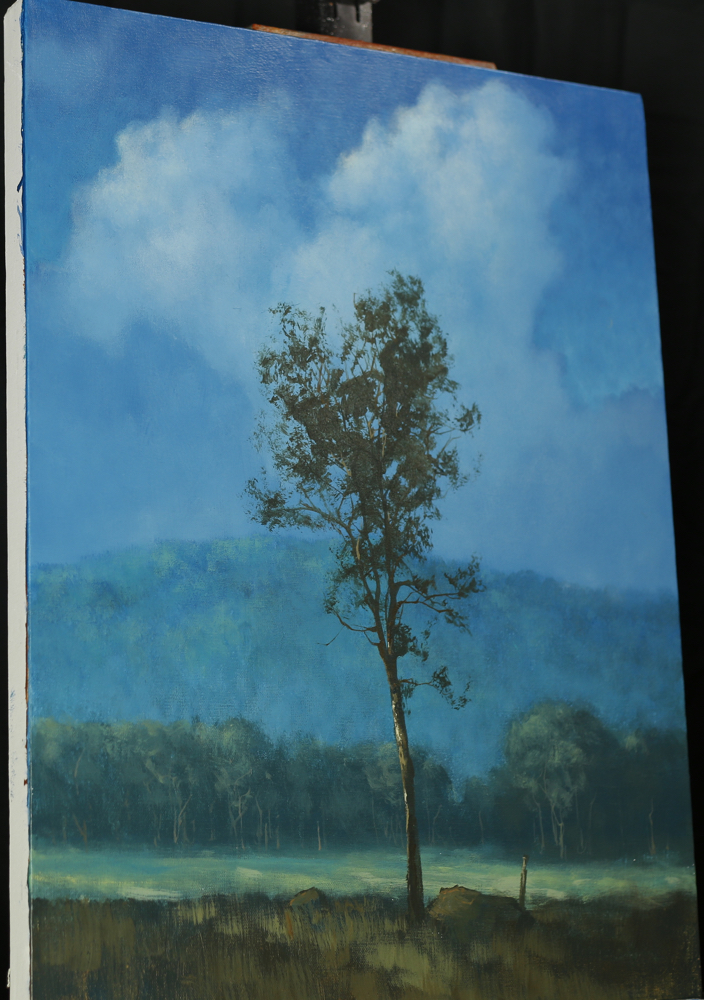
Next we go back to our sky color (Cerulean Blue Dark mixed with Cobalt Teal). Take a flat brush and hold it vertical.
That way you can get the bristles to create a unique pattern as you create a hill just below the cloud. Again we are focusing on creating a silhouette.
We will add details later.
 When you create a hill try to make sure it isn’t just a triangle, or straight across. You want the hill to look natural so you want some variations in height.
You want there to be a peak, but not too dramatic where it starts to look cartoony. Focus on the top edge to start with and then slowly fill in below.
Next, add more coal teal to your sky mixture. Your color should start to look a little more on the greenish blue side.
With your flat brush pick out a few spots to highlight on your hill.
Our light source is left to right, so most of the brightest, more prominent highlights will be on the left.
The light will bend over the hill so you’ll want to add a few highlights here and there on the right side.
It is important to leave some of the dark color in areas to indicate shadows.
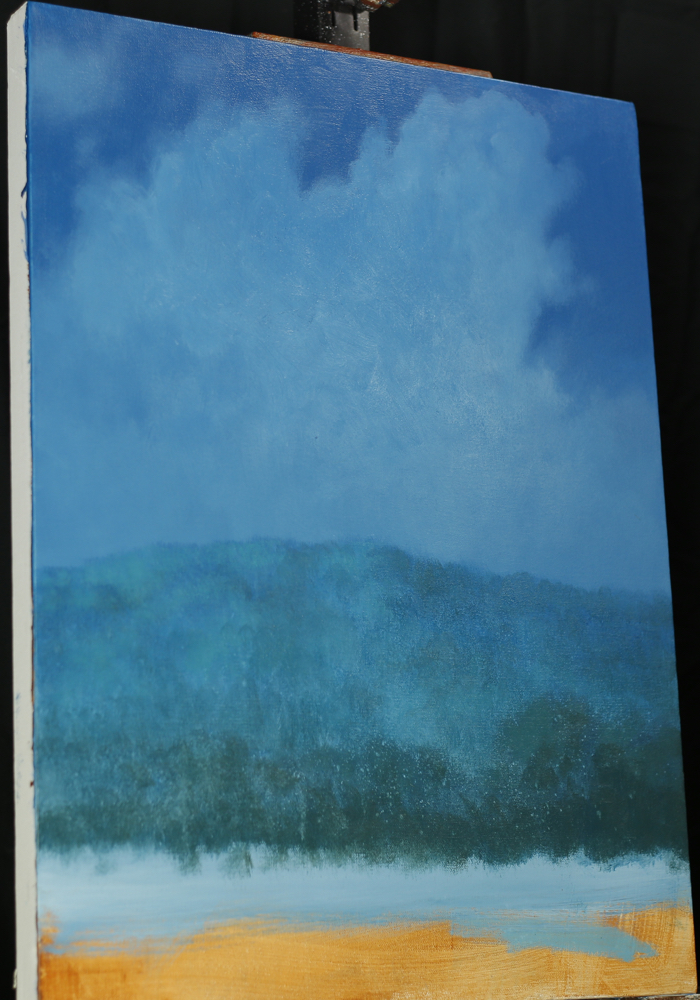
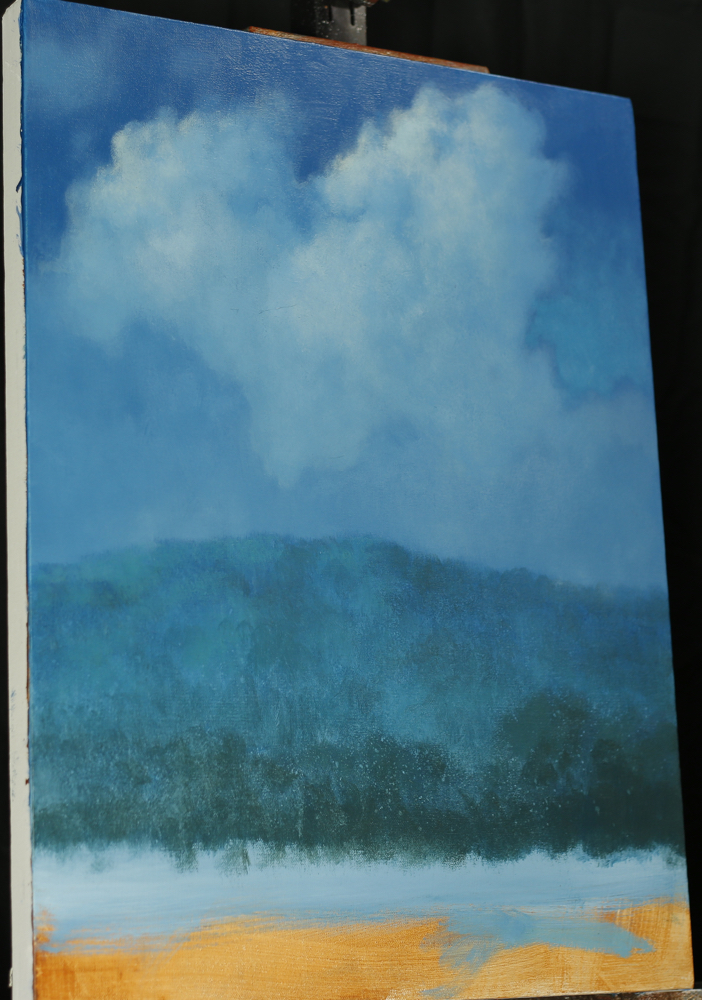
Next, add a touch of raw umber to your sky mixture. We are starting to warm and darken the color.
With your flat brush create a line of trees below the hill. You can use a misting bottle and spray the canvas to make the paint flow a bit easier.
Try to make sure you are keeping the tree line natural looking. You don’t want a straight line across, and you’ll want to vary the heights on the trees.
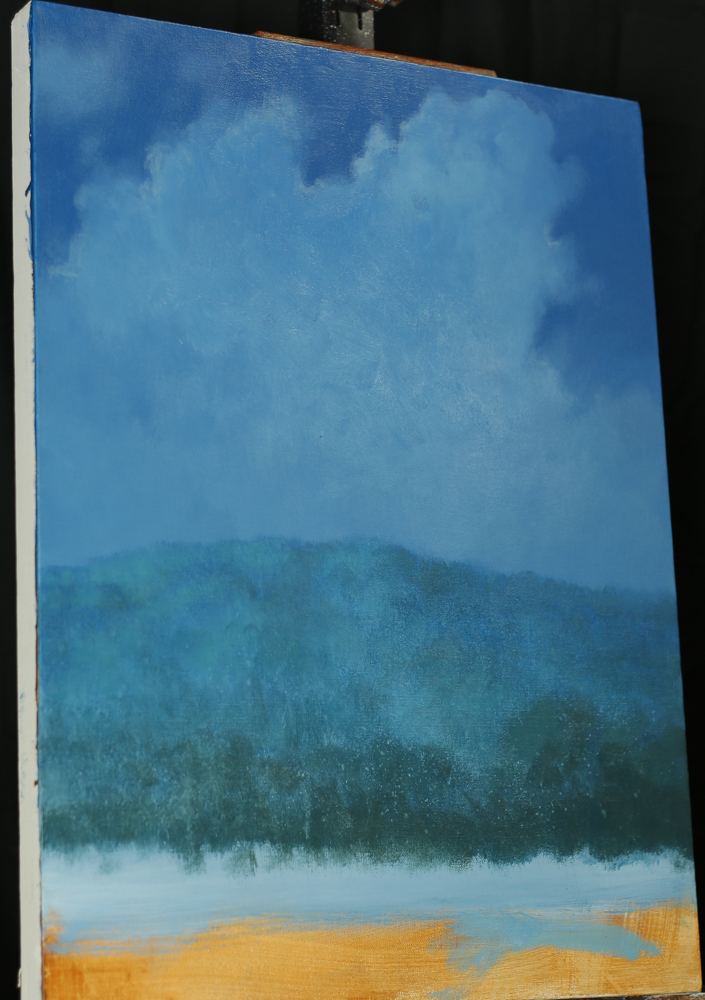
To start this next step I like to use a medium round brush. I want to lighten my sky color again with zinc white.
Not bright white, but just a step up in value. Then I “cut out” another layer of clouds just above the hill.
These clouds will be in shadow and remain a nice dark blue color.
Try to focus on creating some nice peaks and valleys and some unique contours as you cut those clouds out with the light color.
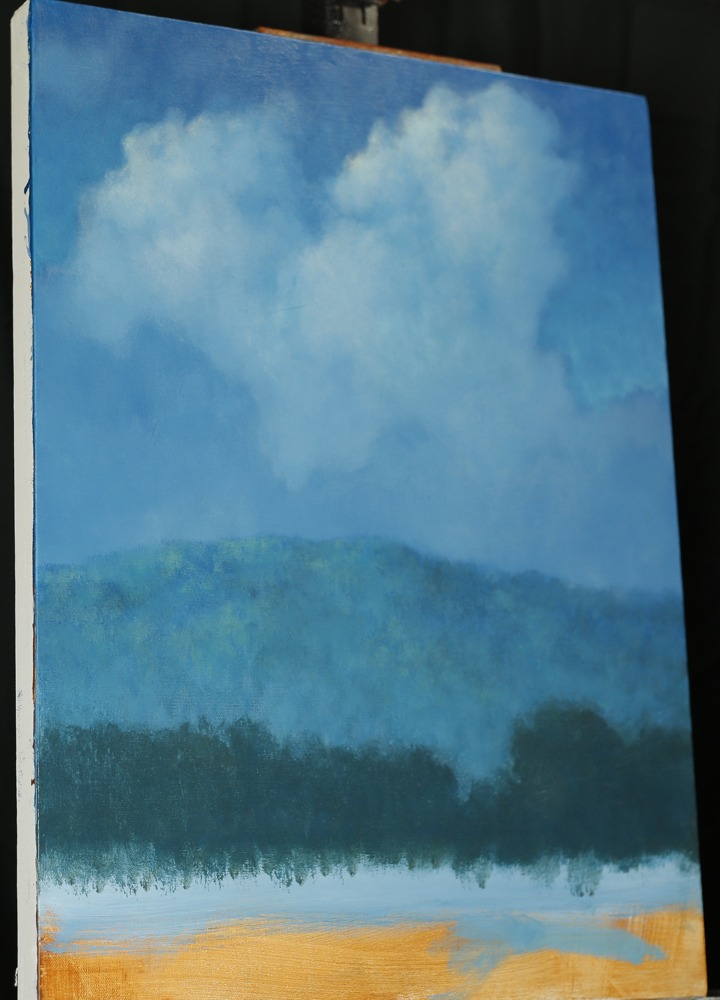
Next I will work that color up through the top part of the cloud. Again we don’t want to be too bright with our white yet.
Try to highlight out toward the light source and blend down and away. You’ll want to leave shadows in behind your highlights.
That is what will create depth within your clouds. You can see above on the right hand picture that I leave little hints of shadow.
You don’t need to be too dramatic with the shadows. Just enough to create depth and dimension.

Once you have created some variations and contours within your cloud, you can start lightening the highlight color with zinc white.
We still aren’t using pure white, we want to continue mixing it lighter slowly.
Try to focus on hitting the areas that would be brightest due to the light source. Then blend down and away leaving shadows in behind your contours.
As you can see from the right hand picture I only highlight midway through the cloud.
The bottom part will be in more shadow so I don’t worry about highlighting those areas at the bottom.

The next step, I lighten the sky on the right hand side. We want there to be a transition in the sky from dark to light.
I mix in a little more teal and zinc white with my cerulean blue. Then, with my round brush, I lightly lighten the area
just above the cloud and work the color up. The zinc white will be transparent enough that you’ll be able to blend up into the darker part of the sky.
I leave a little bit of a silhouette line around the cloud to distinguish it from the sky.
For my next step I add a little more Raw Umber to my tree color (Cerulean Blue Dark, Cobalt Teal, Raw Umber).
I reinforce the line of trees by painting a few more layers of paint over them. I want them to stand out, but not be too dark.
We want to transition slowly into the foreground so darken your tree color, but do it very gradually.
Next I am going to start adding some more subtle highlights on the hill. I’m going to use cobalt teal and a little bit of my cerulean blue.
I want to mix it more on the green side this time. With my flat brush I lightly place some highlights along the top edge of the hill and
work them down and away from my light source. Make sure you leave shadows on the opposing sides of your highlights.
Next, I’m going to add some cobalt teal to my dark tree line color (Cerulean Blue Dark, Cobalt Teal, Raw Umber).
I want to add a few highlights here and there to the trees, and then paint in a little field beneath them.
I want to leave a few inches of space at the bottom for the area that I will paint my red tree.
When you add highlights to the tree line, start at the top toward the light source and make sure you leave shadow
and variation down and away from the light source.
Once you’ve added a few subtle highlights to your tree line, you can move on to the next step.
With a lot of Raw Umber added to your tree line color (Cerulean Blue Dark, Cobalt Teal, Raw Umber) we can create a really dark color.
With your flat brush create a landing area for your tree.
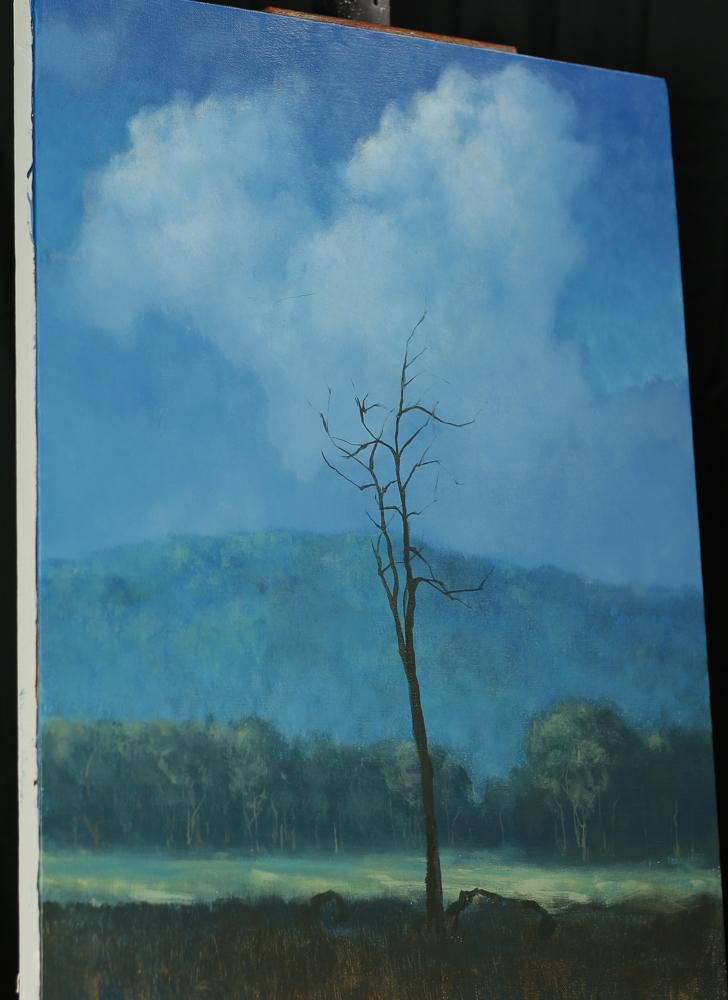 Next, add some water to the mix. With a liner brush or a small pointed round create a trunk of a tree. You can also outline some boulders and rocks in the bottom area of the painting.
With your liner brush start adding in some branches. The more water you add the more ink-like the paint becomes and its easier to make branches. The more pressure you apply to the brush the thicker the branch will be. So as you work your way out to the end of the branch try to have a very fine touch.
Just set up a few branches to give yourself a road map of where your leaves (foliage) will go. You don’t need to overdo it and create a thousand branches because most of them will get covered with leaves, and you can always add branches in later.
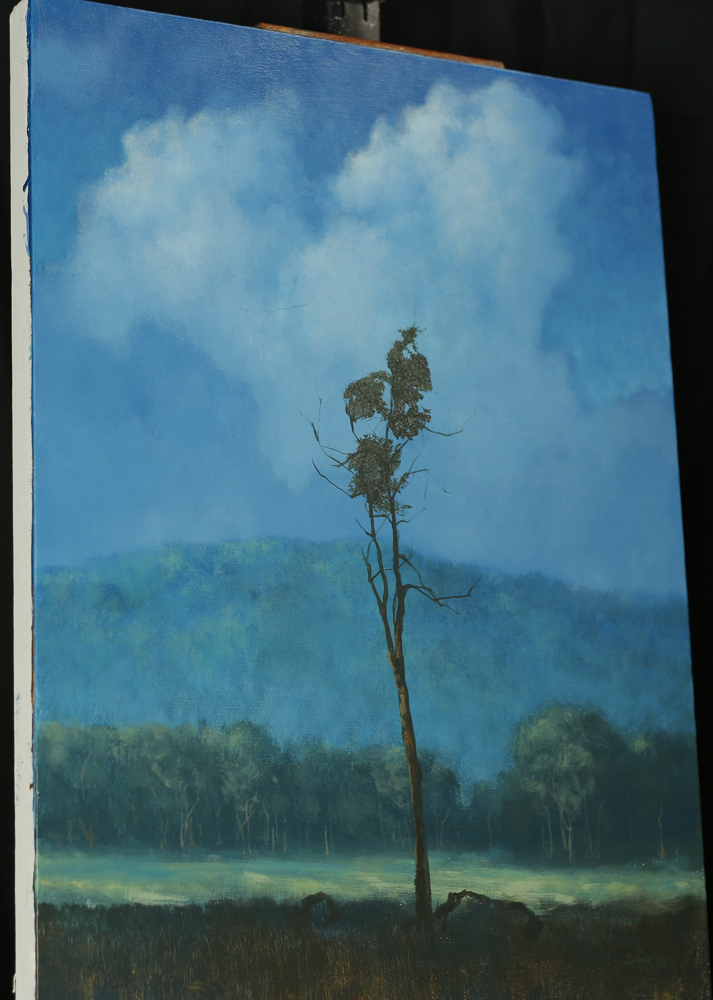
Next add a touch of Cadmium Red Medium to your dark foreground color (Raw Umber, Cerulean Blue Dark, Cobalt Teal).
With your flat brush start adding in some foliage. It’s easier to work from the inside of the tree, out.
Try to make sure you are leaving openings so you can see through the tree to the background. You don’t want to just create a solid mass.
Try to add in some sparse areas here and there (mostly at the bottom) to make the tree look natural.
As you get out to the edges of your tree, apply less pressure to your brush, and almost tap it against the
canvas to create broken paint strokes that look like foliage. Try to work slowly and focus on shape. We are just creating a silhouette to start with.
Next you can take a little Naples Yellow, Burnt Sienna and Raw Umber and add some variations and highlights to the trunk of the tree. Try not to overdo it. Just add some touches here and there to indicate light.
Try to vary the color mixtures into a bright, medium and dark. Use the lightest variation out toward the light source on the edge of the trunk.
For the grass I use a flat brush and a liner brush. I use the flat brush to block in areas and the liner to create a few wispy blades here and there. I’m using yellow ochre mixed with a touch of burnt sienna and cerulean blue dark. I try to create a variety of shades and values.
Using the lighter values I create areas that are more lit up. Like all of my other elements I leave shadow areas in behind highlighted areas to create depth.

Next I add a bit more red to my tree foliage color (Raw Umber, Cerulean Blue Dark, Cobalt Teal). With my flat brush I highlight my foliage in bunches out toward the light source. Each bunch has a shadow behind it to create depth.
I highlight more toward the top and left part of the tree to create a sense of light being cast across the tree.

Slowly add more and more red until you get to a bright red. Continue highlighting toward the light source.
Keep the lower right hand portion of the foliage more in shadow.

Allow the painting to sit. Then come in and lighten elements with brighter values and color. The tree can have a nice highlight on the edge. You can add a moon by just using a higher value sky color (Cerulean Blue Deep, Cobalt Teal, Zinc White).
Use a script liner and add water to your light color to create the moon.
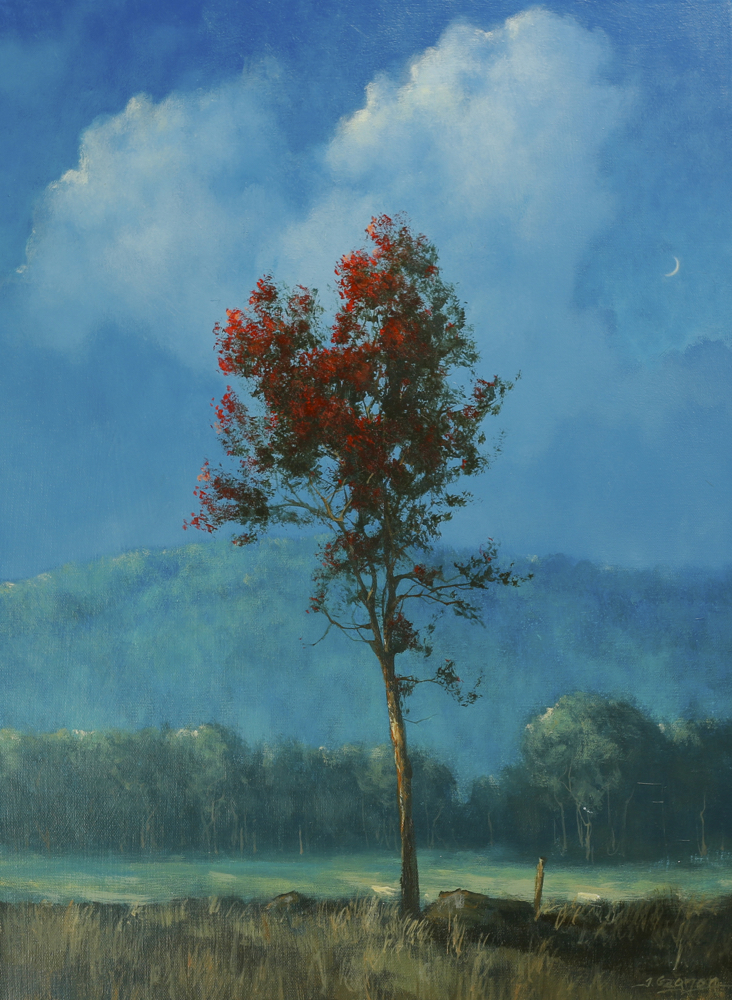
The final step is to take your brightest yellows, whites and reds and add touches of highlights throughout the painting where you find it necessary. Using flat brushes and small pointed rounds you can easily add a variety of highlights with a variety of brush strokes. It can be easy to overdo this stage so go slow. Once you’ve put a few hot spots in you have completed your painting!